Instructions > WW2 German White Topped Hat Cover Fitting Instructions
German White Top Hat Cover Fitting Instructions:
How to fit your white top cap cover to your Kreigsmarine hat:

White Top Hat Cover
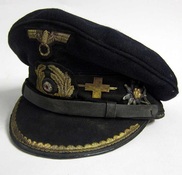
Most caps will be able to take our White Topped Hat Covers, but before buying, ensure that any ‘wreath’ insignia already on the cap has not been sewn onto the top part of the existing cover. This will prevent you from using the cover as it will partly obscure the wreath.
Most wreaths are just ‘tack’ sewn, usually around the hat band so this is not normally a problem. If your wreath is sewn onto the existing top of the cap you can modify it by removing the stitching on the top part of the wreath attaching it to the cap. The best way to do this is to use a sharp modelling knife or scalpel. Just remove the stitching attached to the top cover, not the stitching on the wreath attaching it to the hat band. You may then have to tack sew the wreath onto the hat band to make sure it is 100% secure again. Please don’t do this with a genuine cap – leave it alone!
It is ok if the eagle is sewn on as this will be obscured by the cover. If you have a metal eagle and its of decent quality remove it for using on the white cap cover, or buy a better one here.
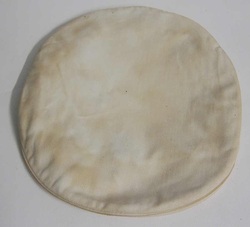
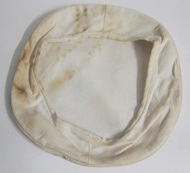
Lay out your cover as in the second photograph below, it is not symmetrical, you need to locate the longest part on the underside of the cover, the part with the slightly raised seam. This is the front of the cover and will go on the front of the cap.
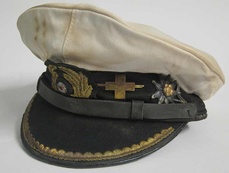
Place the cover over the existing cap with the front of the cover to the front of the cap. Pull the rest of the cover over the cap, tucking in the cap to the inside of the cover. Once fitted go round the whole of the inside of the cap with your hand ensuring the cap edges are well fitted inside the cover. The bottom seam of the cover should not be seen, start at one point and then fold the bottom seam inside the cover all the way round the cap. Make sure the cap cover sits just on the cap head band and is even all the way round.
Finally make sure the front seam of the cover is centrally aliged with the centre of the wreath and adjust by pulling the cover round the hat.
Get your White topped Kreigsmarine Cap cover here.
You can finish off your cap cover with a suitable Kreigsmarine eagle – we supply the worlds best copy and you can get them here. To fit the eagle, place it slightly above where you want it positioned on the cap and with a pencil mark two holes a few millimetres down from the bottom of the eagle wings aligned with where the pins meet the rear of the eagle. Then make 2 very small holes to allow the pins to pass through the cover. Fold back the pins inwards towards the centre of the eagle. Some may find it easier to do this with the cover off the cap but we don't recommend this as it may end up positioned to high or low.
How to remove and replace a wreath: Most wreaths are just ‘tack’ sewn, usually around the wreath to the hat band so this is not normally a problem to remove. The best way to do this is to use a sharp modelling knife or scalpel and cut through the tack stitching. There may be some glue on the back of the wreath so you may have to gently peel of the old wreath.
To attach the new wreath it is best to use a small modelling drill and drill 3 or 4 sets of holes through the wreath edge. Once done align the wreath where you want it and drill through the holes again into your cap. Put some texture glue on the rear and stitch on the new wreath with a needle and thread through the holes you have made. If you are really skilled you can avoid seeing the stitching on the inside of the cap by passing the needle behind the inner liner or you can sometimes remove the inner liner to avoid stitching it.


