Instructions > WW2 & WW1 German Helmet Chinstrap Ageing & conditioning Instructions
German WW1 & WW2 Helmet Ageing Instructions:
How to condition and age your WW1 or WWII German Helmet chinstrap:
|
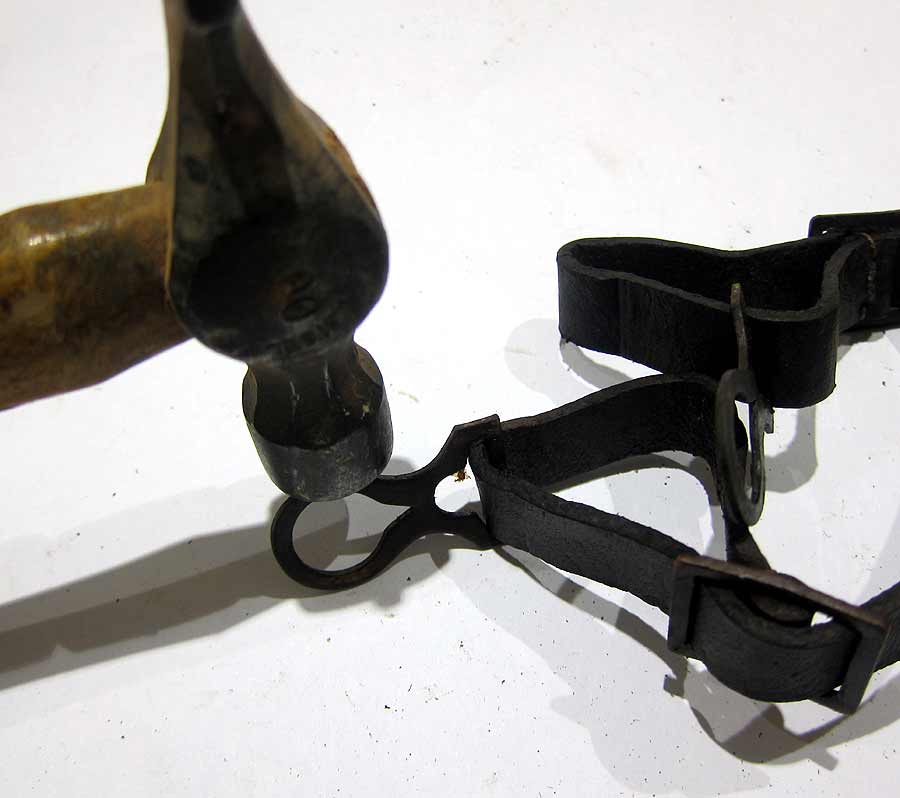
WW1 Chinstrap - adjusting the brass/steel fittings to fit the M16/M17 posts.
If you think your WW1 chinstrap is a bit loose on the posts of your helmet, then you can make them more secure by tapping the edges lightly with a hammer. See the picture opposite, put them on their edge and tap lightly with a small hammer. Then try them for size. Repeat as necessary. Do not bash the living hell out of them! They had the same problem in WW1, hence why there are few helmets found with intact chinstraps. |
Conditioning and further ageing your Chinstrap:
The instructions below are suitable for both WW1 and WW2 helmet chinstraps. The pictures below only show WWI chinstrap but the techniques are exactly the same for a WWII chin strap. We do not offer this as a service as it can be quite time consuming and would effectively make the chinstrap very expensive, but if you have lashings of cash and don't want to do it yourself please contact us!
The instructions below are suitable for both WW1 and WW2 helmet chinstraps. The pictures below only show WWI chinstrap but the techniques are exactly the same for a WWII chin strap. We do not offer this as a service as it can be quite time consuming and would effectively make the chinstrap very expensive, but if you have lashings of cash and don't want to do it yourself please contact us!
|
|


