Instructions > Military Stencil Instructions
Military Stencil Instructions:
Military Stencil Template Instructions:
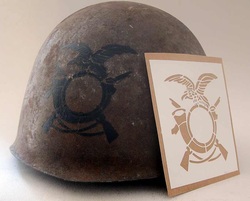
WW2 Italian Helmet Stencil
You will find that if you follow these instruction you will get the best from the stencil and a true representation of a genuine WW2 M1, M2, M1C, German, Polish, Italian or British Helmet.
Items required: Masking Tape, a hairdryer or heater (optional), paint(s).
Any oil based or acrylic paint will be fine, even emulsion and radiator paints are suitable. Just avoid any water based paints. Small pots of modelling paint such as Humbrol or Tamiya etc. are suitable for a few stencils.
1. Preparation:
The helmet should be dry and free of dust and loose particles otherwise it will not stick! It is not meant to be sticky like cellotape is is meant to be tacky to allow it to peel off easily without leaving markings on the helmet.
2. Position the Stencil:
The helmet should be at room temperature or slightly above, you should warm the decal with a hairdryer gently to make it more pliable. Although this is not strictly necessary it does help if your helmet is heavily corked.
Peel off the backing paper and retain. We recommend that you cut slots all the way round your stencil. This allows the stencil to overlap the cut parts and forms a better shape on the helmet. Cut slots up to approximately 5mm from the edge of the stencil cut outs. Position the decal where required and when happy with the position go round the whole edge of the perimeter pressing firmly with your finger to ensure the inner edge (where the paint will go), is adhered properly.
3. Mask & Use:
Use masking tape to hold down the outer edges. If you intend to spray paint the decal then ensure the whole rest of the helmet is masked off or covered with cloth to prevent paint drifting onto the rest of the helmet! If you are hand painting then apply it very dry in a dabbing/stabbing motion taking care at the edges. If some of the inner sides start to lift this is generally not a problem just hold it down with your finger as you paint!
4. Dry & Peel:
Leave to dry and peel off the masking tape and decal gently. You should have a perfect painted decal. If you have a multi coloured paint decal then you will need to reapply the decal over the original paintwork in order to create the second colour.
This decal can be used several times and does not have to remain tacky, it can be used dry and I have decals that have been used several times.
5. Art not Science:
Remember this is an art not a science but if you have any problems feel free to email us to see if we can help!
Some of our kits have 'ticks' to indicate the battalion, 1st at 3 o'clock, 2'd at 6 o'clock and 3'd at 9 o'clock. Regimental HQ is at the 12 o'clock position. You can either cut off the ones not required or position the decal appropriately
masking off the others.
Specific detailed instructions for some WW2, Korean & Vietnam War Stencils:
Vietnam ARVN Rangers:
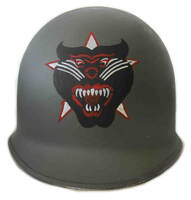
The ARVN Rangers Black Panther set of stencils is extremely hard to apply. It can only be hand painted. The method detailed below is what we found to be most suitable but there are other ways you can use the set of stencils.
Step 1. Cut slots round the solid panther to within 5mm of the edge of the head. Position it centrally on the helmet. You will not be able to flatten the whole stencil due to the curve of the stencil, but you should be able to get the edge adhered all the way round. Paint it in black. Alternatively use half the stencil and apply the top part, allow to dry and paint in the bottom part!
Step 2. Using the stencil that will be painted red, position the top part of the star on the panthers head. Make sure the rest of the stencil is central. You will not be able to paint in all the lines in one go. Apply the paint in small sections bending the stencil as necessary. Alternatively do the sections of the stencil in several 'passes' = apply, dry, apply, dry etc.
Step 3. Using the stencil that will be painted white, position the top part of the star inside the top red star outline. Make sure the rest of the stencil is central. You will not be able to paint in all the lines in one go. Apply the paint in small sections bending the stencil as necessary. Alternatively do the sections of the stencil in several 'passes' = apply, dry, apply, dry etc. Another way of doing it, is to hand paint the white parts of the stars and use the stencil for the remainder.
Buy your ARNV Rangers Panther Stencil here.
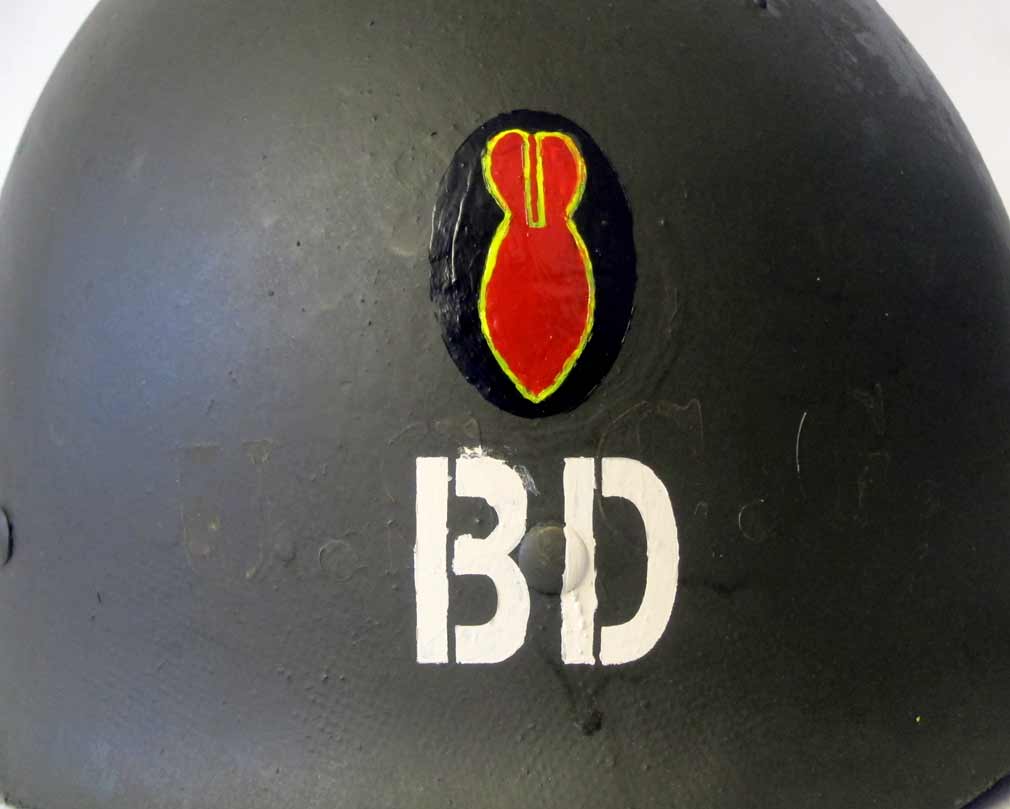
US WW2 Bomb Disposal
|
This stencils is suitable for hand painting only. You will need a very small and thin paintbrush for the yellow outline and a very steady hand!
Step 1 - using the stencil 'oval' paint in roughly where the yellow outline will be. Step 2 - Once dry apply the outline stencil including the tail fin. Step 3 - Paint in the black and red. Step 4 - remove the stencils and you will see the rough yellow outline. Hand paint in the yellow. You may also need to touch up the red and black at this point. Step 5. Paint in the 'BD' - you can use the stencil to adjust the height on the helmet. |
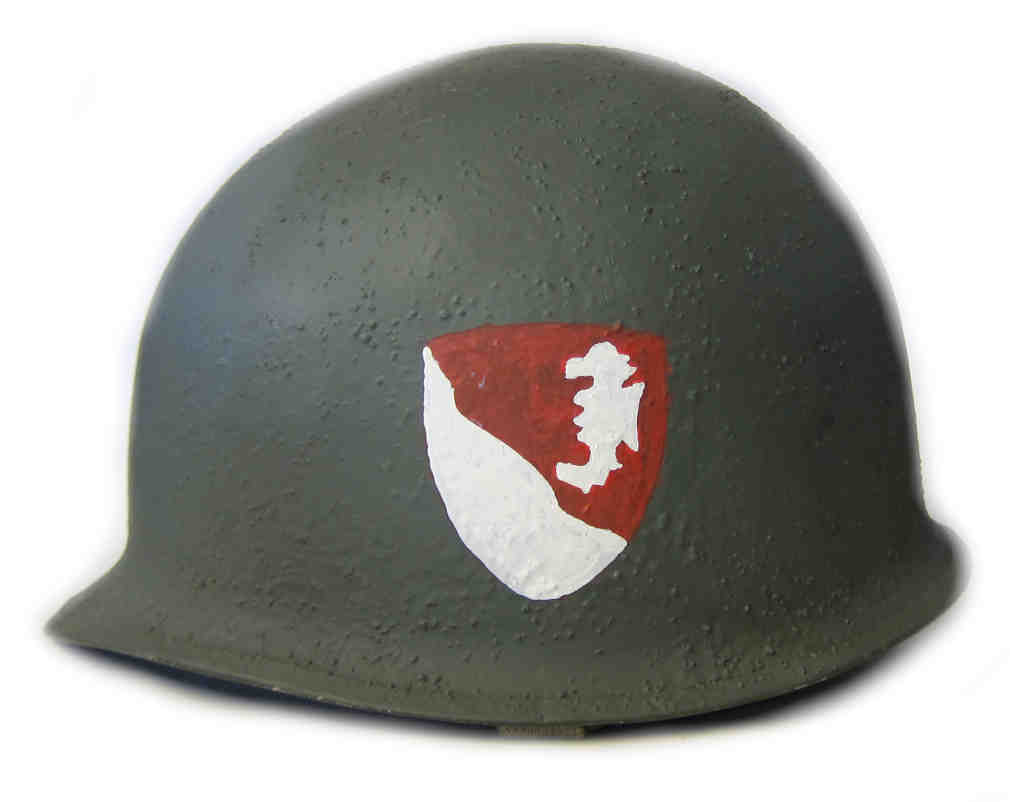
36th Engineer Brigade
|
Apply the shield first in red paint. Allow to dry and remove the shield.
Then apply the 'seahorse' stencil in the correct position at the top of the stencil and paint in the bottom half of the shield in white and then the seahorse in white. Allow to dry and touch up any parts in white or red. |
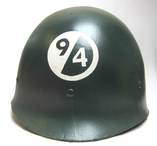
94th Infantry Division Stencil
|
This stencil is suitable for hand painting and is a little tricky but can be done by anyone with a steady hand.
Cut slots round the large outer circle and position on the helmet. Do not attempt to make the whole stencil stick flat to the whole surface, just stick down the circle part that you will be painting and leave the rest sticking up. Position lightly inside the circle the '9' stencil, then position the '4' stencil. Remove the '9' stencil and then paint in the outer cicle and '4'. Wait to dry then reposition the '9' stencil and paint in the '9'. |
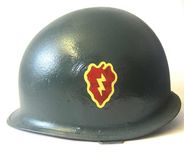
25th Infantry Division Stencil
|
This stencil is suitable for hand painting and can easily be done by anyone with a steady hand.
Apply the smaller inner leaf stencil first - the one with the lightening bolt. Hand paint the red. Allow to dry and remove the stencil. Apply the larger leaf stencil centrally around the inner one. Hand paint the outline and lightening bolt in yellow. Paint in the support tabs for the lightening bolt in red. |
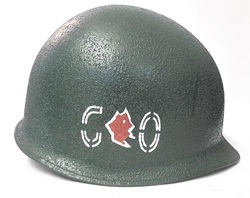
9th Infantry Division 60th Regiment Stencil
|
This stencil is suitable for hand painting and can easily be done by anyone with a steady hand. We deliberately use an overly corked helmet in our example to show that it can be painted on a rough textured helmet.
There are two stencils - one for each side - make sure the devils head faces forward on each side. Cut slots round the stencil to approximately 5mm from the edge of the stencils and apply it to your helmet. Use masking tape gently to hold it in place. Hand paint in the 'GO' and the Devil. Allow to dry and remove. Use the reverse of the right hand stencil to paint the devil outline in white on the left hand stencil. |
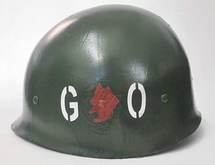
9th Infantry Division 60th Regiment Stencil
|
This stencil is suitable for hand painting and can easily be done by anyone with a steady hand. We deliberately use an overly corked helmet in our example to show that it can be painted on a rough textured helmet.
There are two stencils - one for each side - make sure the devils head faces forward on each side. Cut slots round the stencil to approx 5mm from the edge of the stencils and apply it to your helmet. Use masking tape gently to hold it in place. Hand paint in the 'GO' and the Devil. Allow to dry and remove. |
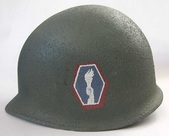
442nd Regimental Combat Team Helmet Stencil
|
This stencil is suitable for hand painting and can easily be done by anyone with a steady hand. We deliberately use an overly corked helmet in our example to show that it can be painted on a rough textured helmet.
There are three stencils - use the large hexagon first. Using masking tape, tape it to the helmet. Make sure the stencil edges are smooth and paint it in red. Allow to dry and then using the smaller hexagon place it inside the larger red painted hexagon. This is tricky to get it all aligned properly. Tape it down and paint in the blue and allow to dry. Finally , using the 'hand and torch' stencil, align this to the edges of the blue hexagon, tape it down (if required) and paint in the white using very thick dry paint if you want to get the thin lines of the hand details. Allow to dry and remove the stencil. Using a small paintbrush hand paint in the tabs of the white outline and you can also touch up any blue or red areas if required. |
326th Airborne Medical Company Helmet Stencil
 326th Airborne Medical Company
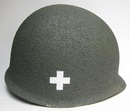
This stencil is suitable for hand or spray painting and can easily be done by anyone with a steady hand. Cut slots all round the stencil to about 5mm of the stencil pattern. Apply the stencil and tape down (if spray painting) - the slots should be allowed to overlap each other if this occurs.
Using white paint, paint it all in - use a dry brush and apply several dry coats. Allow to dry and remove. After studying various pictures we can say that most 326th Abn Medic Co. helmets were hand stencilled.
Using white paint, paint it all in - use a dry brush and apply several dry coats. Allow to dry and remove. After studying various pictures we can say that most 326th Abn Medic Co. helmets were hand stencilled.
WW2 Soviet - Russian Navy Marine Stencil
 Soviet Navy
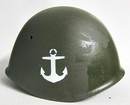
This stencil is suitable for hand or spray painting and can easily be done by anyone with a steady hand. Cut slots all round the stencil to about 5mm of the stencil pattern. Apply the stencil and tape down (if spray painting) - the slots should be allowed to overlap each other if this occurs.
Using white paint, paint it all in - use a dry brush and apply several dry coats. Allow to dry and remove.
OK the helmet is not Soviet! We don't have one currently - sorry!
Using white paint, paint it all in - use a dry brush and apply several dry coats. Allow to dry and remove.
OK the helmet is not Soviet! We don't have one currently - sorry!
WW2 100th Infantry Division Helmet Stencil
 100th Inf Div
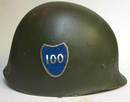
This stencil is only suitable for hand painting and can easily be done by anyone with a steady hand. Apply the blank shield first and paint in blue. Allow to dry and then apply the '100' stencil making sure the edges surround the blue shield properly. Paint in the outline and the bottom half of the '100' in gold or yellow paint and allow to dry. Paint in the top half of the '100' in white paint and allow to dry. Remove the stencil and hand paint in the sections where the 'tabs' were, including joining up the gaps in the '100'. Some WW2 helmets left the tab gap on the outline sides, so you can also leave them if you wish.
WW2 82'd Airborne 505th PIR Thid Battalion Helmet Stencil
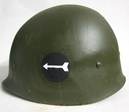 505th PIR 3'd Battalion
This stencil can be hand or spray painted and is very straightforward to apply. Stick down the circle stencil first and run your finger round the outline to ensure that there are no gaps. Paint in by hand or spray paint (masking of the rest of helmet first).
Allow to dry and apply the arrow stencil making sure the arrow faces forward on both sides of the helmet. This can be done by hand or spray.
The picture to the right shows how it has been applied to a liner and over the liner webbing rivet - it still looks nice and straight so applying to a M2 helmet should be easy.
WW2 65th Infantry Regiment "The Borinqueneers" Helmet Stencil
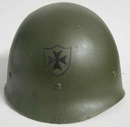 WW2 65th Inf Regt.
This stencil is only suitable for hand painting and can easily be done by anyone with a steady hand. Cut slots all round the stencil to about 5mm of the stencil pattern. Apply the stencil and tape down - the slots should be allowed to overlap each other if this occurs.
Using black paint, paint it all in - use a dry brush and apply several dry coats. Allow to dry and remove. Hand paint in all the 'tabs' in black. Buy your stencil here.
Using black paint, paint it all in - use a dry brush and apply several dry coats. Allow to dry and remove. Hand paint in all the 'tabs' in black. Buy your stencil here.
Korean War 65th Infantry Regiment "The Borinqueneers" Helmet Stencil
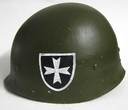 65th Infantry Regiment
This stencil is only suitable for hand painting and can easily be done by anyone with a steady hand. Cut slots all round the stencil to about 5mm of the stencil pattern. Apply the stencil and tape down - the slots should be allowed to overlap each other if this occurs.
Using white paint, paint it all in - use a dry brush and apply several dry coats. Allow to dry and remove. Hand paint in all the 'tabs' in white. Allow to dry then hand paint in the inside with black paint. You can make this easier by masking off the straight edges, allowing to dry and then work your way round the stencil. If you do have a steady hand no need to do this. The originals from what we can see were not that precise anyway! Buy your stencil here.
Using white paint, paint it all in - use a dry brush and apply several dry coats. Allow to dry and remove. Hand paint in all the 'tabs' in white. Allow to dry then hand paint in the inside with black paint. You can make this easier by masking off the straight edges, allowing to dry and then work your way round the stencil. If you do have a steady hand no need to do this. The originals from what we can see were not that precise anyway! Buy your stencil here.
WW2 10th Mountain Division Stencil
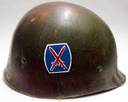
10th Mountain Division
Apply the curved rectangle first and paint in blue. Leave this stencil in place. Then apply centrally the large crossed bayonets and paint in white and paint a white outline in the gap round the outside. Then apply the third stencil the small crossed bayonets and paint in red. The success of this stencil is all about getting the stencils as central as possible. However, do not worry if it is not perfect there are many examples where they are nowhere near as accurate as the one opposite.
WWII 77th Infantry Division Stencil
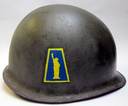
77th Infantry Division
This stencil was used either with or without the yellow border, both have been seen in period WW2 photographs. This stencil allows you to make either option. It is only really suitable for hand painting. Apply the chopped triangle box first and apply the blue paint. allow to dry and then apply the Statue of Liberty in yellow. Allow to dry and then apply the yellow outline if required.
World War Two Helmet Stencil 17th Airborne Division Stencil
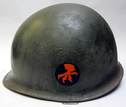
17th Airborne Division
This stencil is extremely rare but was definately used after WW2 but with the 'Airborne' insignia above the clawed foot. The WW2 version had no 'Airborne' insignia above the eagles foot. It is only really suitable for hand painting. Apply the circle first and hand paint in black. Allow to dry and apply the eagles claw in orange (not yellow). Allow to dry and then apply the border if required as both border and border-less versions did exist.
WWII Forty Fifth Infantry Division - ThunderBird Stencil

45th Infantry Division
This stencil can be hand or spray painted. There is no need to cut slots round the outside. Apply the diamond first and paint in red. Allow to dry and then apply the 'thunderbird' stencil over the red diamond and paint in yellow. Optional - paint a small red dot in for the Thunderbird's eye (not shown on the picture to the left).
WW2 American NCO Rank Chevrons - up to Staff Sergeant or Technician Third Grade
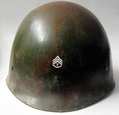
WW2 USA NCO Rank
This stencil can be hand painted or spray painted. If you helmet is heavily corked we recommend hand painting. This one is simple, apply the stencil, smooth it down and paint in by hand, or mask off rest of helmet before spray painting. You may want to paint in the stencil supporting tabs by hand as we have done in this example. You can also make this a master sergeant by allowing to dry and then moving down the stencil to apply the second and third 'U' - upper chevrons. The instructions above should be used for both straight and curved chevron stencils.
WWII 69th Infantry Division Helmet Stencil
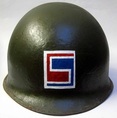
69th Infantry Division
This stencil is suitable for hand or spray painting. Apply the rectangle first and paint in white. Allow to dry and the apply the stylised '69' stencil. Paint the '6' in red and the '9' in blue. If spray painting you will need to mask off each of the '6' and '9' in turn, which requires you to cut out masking tape to cover the areas you don't want to cover. There is no need to cut slots around either of the stencils.
WW2 11th Airborne Division Helmet Stencil

11th Airborne Stencil
This is a very intricate stencil suitable only for those with a steady hand and is also only suitable for hand painting.
Apply the shield and curve first and paint in blue & allow to dry. Apply the 'Airborne' curve and the wings curve and paint in white & allow to dry.
After removing the airborne stencil paint the gaps in the characters with a fine brush. Apply the hollow circle and paint in red and allow to dry then apply the '11' stencil and paint in by hand.
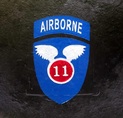
11th ABN Stencil
You can also paint in a white line between the 'Airborne' curve and the shield as some had this marking and others did not.
See the close up picture of the outstanding results that can be achieved with this 11th Airborne helmet stencil if you have patience and a steady hand.
See the close up picture of the outstanding results that can be achieved with this 11th Airborne helmet stencil if you have patience and a steady hand.
WW2 92'd Infantry Division MP Stencil Buffalo Soldiers
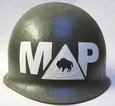
MP 92'd Inf Div
Remove the buffalo triangle and apply the 'M triangle P' stencil after cutting slots round it. Tape down and using a fine paintbrush and dry paint, paint round the edges of the stencil. Allow to dry and remove, then paint in the rest of the 'M triangle P' by hand. Allow to dry and apply the buffalo triangle. Paint in black with a fine paintbrush and dry paint, allow to dry and remove. This MP helmet would also have had a white band round the middle of the helmet and this can be done using masking tape.
Post WW2 1946 to 1952 US Constabulary Helmet and Liner Stencil:

US Constabulary
This stencil is very tricky to apply due to its size and shape. Apply the circle first after cutting slots round the outside. You will not be able to smooth down the sides flush with the helmet, instead leave the sides away from the helmet and hand paint round the outside. Allow to dry and then apply the 'O & C' in blue paint, again using the stencil as a guide. Allow to dry and then paint in the lightening bolt.
You may have to touch up the yellow, blue and red by hand after it is completely dry.
You may have to touch up the yellow, blue and red by hand after it is completely dry.
WW2 Second Infantry Division Stencil - Indian Head WW2 & WW1:

2'd Infantry Div
Apply the shield first and hand paint in black. Allow to dry and then hand paint the blue shield outline if desired (they did not always outline the shield). Apply the star and paint in white. Allow to dry and then apply the indian head, paint the head in red and the ribbons in blue. Allow to dry and then hand paint in white the ribbon lines (they did not always paint the feather lines). There were numerous variations of this stencil used in WWI and WWII, this stencil allows you to hand paint several different variations. The stencil like all our stencils are re-usable.
508th PIR 3'd Battalion 'Blue Foot' Stencil:

508th PIR Blue Foot
This decal is only really suitable for hand painting, since it has to be reversed in order for the foot to face forward on both sides. Having applied the decal on one side and after allowing any paint to dry on the decal, you need to reverse the decal and tape it down using masking tape. You can then carefully hand paint it holding down the sides of the decal as you go along. It is a bit of an art so if you are unsure it is best to practice on an old tin can or similar item before attempting it on the helmet!
508th PIR 2'd Battalion 'Double Lightning Bolts':

508th PIR Lightening
This decal is only really suitable for hand painting, since it has to be reversed in order for the double bolts to face forward on both sides. Having applied the decal on one side and after allowing any paint to dry on the decal, you need to reverse the decal and tape it down using masking tape. You can then carefully hand paint it holding down the sides of the template as you go along. It is a bit of an art so if you are unsure it is best to practice on an old tin can or similar item before attempting it on the helmet.
82'd Airborne MP Stencil WW2:
 82d Airborne MP
Cut round the stencil with slots to a few millimetres of the 'MP' . Apply the stencil and tape down. Apply the paint by hand or if spraying mask off all the helmet exposing only the stencil.
Hand painting is best if you want a 100% authentic marking and remember transfers or decals were not used for marking 82'd Div helmets in WW2.
Hand painting is best if you want a 100% authentic marking and remember transfers or decals were not used for marking 82'd Div helmets in WW2.
82'd Airborne Division Insignia Stencil WWII:
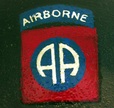
82'd Airbone
Apply this with a dry brush otherwise there could be paint 'bleed' through the smaller decal cuts but if this occours then you will need to paint out any 'bleed'.
This is a three part decal. Apply the 'square' first and allow to dry throughly! Then apply the circle and 'Airborne' curve. The curve should just touch the top corners of the square and this will position the circle in the centre of the square. Paint in the circle and curve and allow to dry throughly.
Apply the 'Airborne' and 'AA' decal, align the 'Airborne' centrally in the curve and the 'AA' should then be aligned centrally in the circle.
101'st Airborne Division Screaming Eagles Stencil:

Apply this with a dry brush otherwise there could be paint 'bleed' through the smaller decal cuts but if this occours then you will need to paint out any 'bleed'.
Apply the 'Shield' and 'curve' decal first and paint as appropriate.
Allow to dry throughly and apply the 'Airborne' and 'eagle' decal. The 'Airborne' should be positioned centrally in the curve and this will ensure the eagle is central in the 'shield'.
Apply the 'Shield' and 'curve' decal first and paint as appropriate.
Allow to dry throughly and apply the 'Airborne' and 'eagle' decal. The 'Airborne' should be positioned centrally in the curve and this will ensure the eagle is central in the 'shield'.
505th 1'st Batallion - Jack of Diamonds Stencil:

Apply this with a dry brush otherwise there could be paint 'bleed' through the smaller decal cuts but if this occours then you will need to paint out any 'bleed'.
Position decal as appropriate. Using orange paint, paint in the 'square' box. Remove the decal (this can be done when the paint is still wet) and then paint in the full square.
Allow to dry throughly and then position the decal again on the orange square. Paint in the black 'J' and 'box' outline. Remove the decal (this can be done when the paint is still wet)
and then hand paint in the rest of the 'box' at the corners.
501st Parachute Infantry Regiment Stencil & other Airborne units:

This stencil is a square so you need to cut off the 'ticks and rotate the square so it is positioned as a diamond. Once dry use one of the cut off 'ticks'
to create 1, 2 ,3 or HQ Company 'tick'. The square can be used to create the following units: 101st Divisional HQ Company & Recon Platoon - tick to 12 o'clock of square.
101st Airborne Signal Company - tick to 9 o'clock of square.
426th Airborne QM Corps Company - tick to 6 o'clock of square.
801st Airborne Ordanance Company - tick to 3 o'clock of square.
505th PIR 82d Airborne Lion:

This stencil is only really suitable for hand painting, since it has to be reversed in order for the lion to face forward on both sides.
Having applied the decal on one side and after allowing any paint to dry on the decal, you need to reverse the decal and tape it down using masking tape. You can then carefully hand paint it holding down the sides of the decal as you go along. It is a bit of an art so if you are unsure it is best to practice on an old tin can or similar item before attempting it on the helmet!
Having applied the decal on one side and after allowing any paint to dry on the decal, you need to reverse the decal and tape it down using masking tape. You can then carefully hand paint it holding down the sides of the decal as you go along. It is a bit of an art so if you are unsure it is best to practice on an old tin can or similar item before attempting it on the helmet!
56th Infantry Division WW2 Black Cat Helmet Stencil:

Use the rectangular template first and apply red paint. When dry remove stenil and apply the cat over the outer edges of the red rectangle. Paint the cat in black. You may want to touch up areas of any bleed with red paint, most likely around the cats whiskers.
Eight Army desert Rat:

Use the square template first and paint it all red. When dry apply the rat template and paint the black. Be careful and use 'dry' paint otherwise the paint will run into the rat.
Once dry paint over any supporting lines, leave to dry and outline the rat in white! You need a small brush and a steady hand but just follow round the outline of the rat!
The original hand painted ones were all different so dont worry if a line or two is out of size!
Once dry paint over any supporting lines, leave to dry and outline the rat in white! You need a small brush and a steady hand but just follow round the outline of the rat!
The original hand painted ones were all different so dont worry if a line or two is out of size!
Special Engineers Brigade Stencil:

We recommend cutting slots all the way round the stencil before applying it to the helmet. We also recommend cutting the arc away from the shield so they can be applied separately but depending on how you apply it this may not be necessary if you are just using the stencil as a guide to hand painting.
Apply the white curve first and allow to dry. Make sure you leave enough room to do the rest of the template! Then position the blue box symettrical to the curve - some people cut and separate the curve from the box to make it easier. Do the blue box next and allow to dry completely. Then apply the yellow Special Engineers sign. It may be easier to gently paint in by hand the yellow insignia using the decal as a template rather than over painting the whole decal as it is very fine in areas! In summary use the template for the white curve either spray or stencil brush painted but for the yellow insigina use the template as aguide to hand paint using a semi-dry brush. This one is a bit of an art due to the curve of the helmet and the delicate design of the insignia!
Apply the white curve first and allow to dry. Make sure you leave enough room to do the rest of the template! Then position the blue box symettrical to the curve - some people cut and separate the curve from the box to make it easier. Do the blue box next and allow to dry completely. Then apply the yellow Special Engineers sign. It may be easier to gently paint in by hand the yellow insignia using the decal as a template rather than over painting the whole decal as it is very fine in areas! In summary use the template for the white curve either spray or stencil brush painted but for the yellow insigina use the template as aguide to hand paint using a semi-dry brush. This one is a bit of an art due to the curve of the helmet and the delicate design of the insignia!
M1 Helmet Stencil USA 29th Infantry Division WW2 WWII Ying Yang

Apply the white first, allow to dry properly and then apply the blue paint, it can be either hand or spray painted.
Make sure the white stencil is central to the helmet otherwise the whole decal will look irregular.
Make sure the white stencil is central to the helmet otherwise the whole decal will look irregular.
American Helmet Stencil USA 36th Texas Infantry Division WW2

Apply the larger stencil first and paint in dark or light blue (various shades were used). Allow to dry and then apply the stencil with the 'T' in the middle over the previous paintwork.
Paint the 'T' in with matt green paint or semi-matt, again various shades were used.
Paint the 'T' in with matt green paint or semi-matt, again various shades were used.
British Corps of Military Police Stencil:

Apply the rectangle first and paint in dark blue (various shades were used). Allow to dry and then apply the stencil with the 'MP'in the middle over the previous painted rectangle, you should be able to align the edges with the 'MP' stencil edges. Apply the 'MP' in red and when the paint is tacky or dry remove the stencil. Paint in the 'stems' on the 'P' by hand, as this decal was all solid. If you have spray painted it, then spray some paint into a container and use a small brush to paint in the 'stems'.
32'nd Infantry Division Helmet Stencil

Cut round the stencil with slots to a few millimetres of the arrow. Apply the stencil and tape down. Apply the paint by hand or if spraying mask off all the helmet exposing only the stencil.
Reconnaissance Platoon 101st Airborne Stencil

Cut round the stencil with slots to a few millimetres of the'R' . Apply the stencil and tape down. Apply the paint by hand or if spraying mask off all the helmet exposing only the stencil. Hand painting is best if you want a 100% authentic marking and remember transfers or decals were not used for marking Recon helmets in WW2. Which is true of all airborne helmets and pretty much 99% of other helmet markings.
7th & 8th Naval Beach Battalion Helmet Stencil WW2
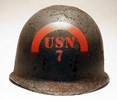
7th & 8th NBB Stencil
Cut round the stencil with slots to a few millimetres of the edges. . Apply the stencil and tape down allowing the slots to overlap each other. Apply the paint by hand or if spraying mask off all the helmet exposing only the stencil. The picture shows a freshly applied stencil before it has been aged to suit the helmets condition. Alternatively, apply the 'USN and numeral' first, allow to dry and then apply the curve.
USA War Correspondent Helmet Stencil

War Correspondent
Cut round the stencil in a circle approx. 2 cm from the text. Then cut small slices up to approx 5mm of the edge of the text, all the way round at approx 1 cm intervals.
This allows you to overlay the cut segments over each other and fit the stencil to the curved helmet.
It can be spray painted or hand painted. Most appear to be hand painted so if you do
it by hand, allow to dry and then you can fill in the gaps between the characters by hand.
This allows you to overlay the cut segments over each other and fit the stencil to the curved helmet.
It can be spray painted or hand painted. Most appear to be hand painted so if you do
it by hand, allow to dry and then you can fill in the gaps between the characters by hand.
WW2 Canadian Ontario Provincial Police Helmet Stencil OPP

Ontario Provincial Police
This stencil is suitable for hand painting only. Apply the stencil and tape down with masking tape as required (There is no need to cut slots round this stencil).
Hand paint in white and allow to become tacky or dry. Remove the stencil and hand paint in the gaps on the 'O' and two 'P's.
Hand paint in white and allow to become tacky or dry. Remove the stencil and hand paint in the gaps on the 'O' and two 'P's.
Austin Motor Company Warden's Helmet Stencil
 Austin Wardens Helmet
Cut slots all the way around the stencil to approximately 5mm of the edge of the 'Austin & W', this allows the stencil to fold over itself slightly. Tape down with masking tape covering the slots and either spray or hand paint. Make sure you cover the rest of the helmet if you are spray painting. You may need to touch up any areas with the original helmet paint if you have any bleed, so be careful and make sure the stencil is fully stuck down. You can spray or hand paint this stencil, we recommend hand painting if you do not have any touch up paint for the main helmet colour.
WW2 Womens Land Army (WLA) Helmet Stencil
 Womens Land Army (WLA)
Cut slots all the way around the stencil to approximately 5mm of the edge of the WLA & Crown, this allows the stencil to fold over itself slightly. Tape down with masking tape covering the slots and either spray or hand paint. Make sure you cover the rest of the helmet if you are spray painting. You may need to touch up any areas with the original helmet paint if you have any bleed, so be careful and make sure the stencil is fully stuck down. You can spray or hand paint this stencil, we recommend hand painting if you do not have any touch up paint for the main helmet colour.
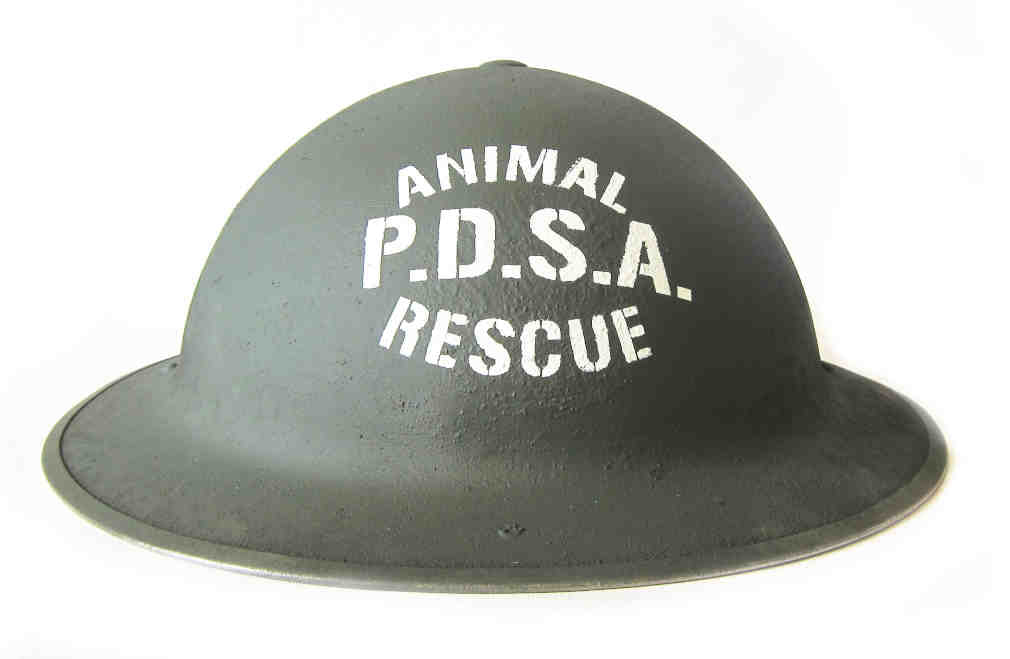
WW2 British Animal PDSA Rescue Helmet Stencil
|
Cut slots all the way around the stencil to approximately 5mm of the edge of the text, this allows the stencil to fold over itself slightly. Tape down with masking tape covering the slots and either spray or hand paint. Make sure you cover the rest of the helmet if you are spray painting. You may need to touch up any areas with the original helmet paint if you have any bleed, so be careful and make sure the stencil is fully stuck down. You can spray or hand paint this stencil, we recommend hand painting if you do not have any touch up paint for the main helmet colour.
You can also stick down each of the three lines of text individually and hand paint each one in turn. |
WWII ARP Warden Helmet Stencil

ARP Wardens Helmet Stencil
Extremely simple! Stick on the stencil and either hand paint or spray paint. The Wardens wore a white 'W' on a black helmet and the chief Wardens wore a black 'W' on a white helmet as portrayed by Bill Pertwee in Dad's Army. just stick down the edges near the 'W' no need to try and stick down the whole stencil to the helmet.
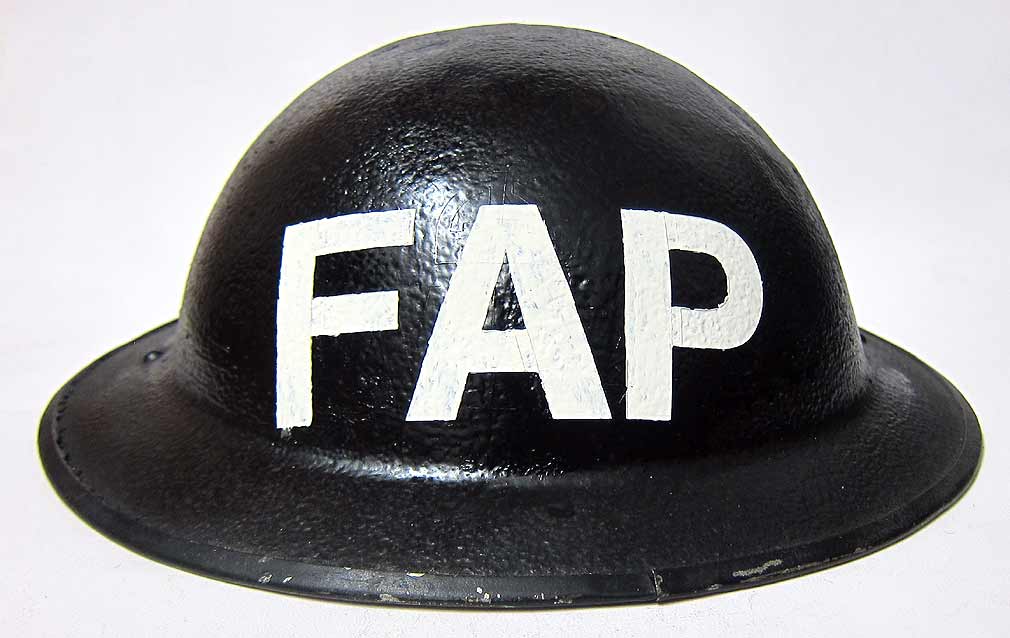
WW2 FAP - First Aid Part Helmet Stencil
|
You can follow the instructions for the 'SFP' stencil, cutting the characters out individually. Or you can cut slots all round the stencil to about 5mm from the edge of the characters. Align centrally and either hand or spray paint. If you spray paint you will need to hand paint in the 'tabs' on the characters. For hand painting: Attach the stencil but only press it down around the characters, it does not matter if the outer edge's do not stick or are raised. Hand paint in white, once dry hand paint the tabs.
|
WWII Street Fire Part Helmet Stencil - Zuckerman Helmet and other Civil Helmets

SFP Helmet Stencil
It is best to cut this stencil into three parts, the F, the S and the P. Apply the 'F' first centrally and make sure the inner edges of the stencil are fully adhered to the helmet. Hand paint and allow to dry. Then apply the 'S' and the 'F' in the same method making sure they are equally spaced and vertical.
WW2 Saint John's Ambulance Brigade Helmet Stencil

Ambulance Helmet Stencil
Apply the outer circle first after cutting slots round the outside. Paint this circle in white either fully or up to 1cm from the edge. Leave this stencil in place, allow to dry fully and then apply the 'St. Johns' worded stencil inside the outer circle. Paint the text in black (use a thick stiff paint not a weak runny paint otherwise it will run. If your paint is runny leave an amount out for 10 to 15 minutes to stiffen up before applying.) At the same time paint in the black inner circle. Allow to dry and then apply the cross stencil inside the 'text' stencil. Paint in the white cross again using thick, stiff paint. If you wish you can hand paint in the gaps in the text. The example to the left is shown as used, without any hand painting of text gaps. The one in the picture to the left has been applied incorrectly. The '4 dots' should be at the bottom of the helmet.
WW2 British Staff Officer Ambulance Service Helmet Stencil
|
Cut slots all round the stencil to within 5mm of the stencil text. Press down firmly and using a dry paint brush, paint in the characters. Once dry remove the stencil and hand paint in the tabs. You may want to paint in the red 'A' text as in the example leaving a black shadow. The Two black rank lines can be made with masking tape.
|
WW2 British Auxillary Fire Service Helmet Stencil:

Apply the star first after cutting slots round the outside. Tap down with masking tape and hand paint with white paint. Once dry apply the 'AFS' stencil centrally within the star, making sure it aligns with the star and is central. Hand paint in red the 'AFS', allow to become tacky and remove stencil. Paint in freehand the gaps in the 'AFS' and circle.
WW2 UK POLICE Helmet stencil:

You can either cut out the characters and apply them one at a time, you may want to do this if you want them to look parallel with the helmet rim. Mark out a line approx 1cm up from the helmet flare and use this as you guide line. Then apply individually and allow to dry before applying the next character. Use masking tape to hold them in position. If you want to apply as a single row of text then cut slots all round the stencil approx 1cm from each character and use masking tape to hold them down. You can then hand paint or spray them. Hand painting is advised.
WWII UK FIRE Brigade stencil:

You can either cut out the characters and apply them one at a time, you may want to do this if you want them to look parallel with the helmet rim. Mark out a line approx 1cm up from the helmet flare and use this as you guide line. Then apply individually and allow to dry before applying the next character. Use masking tape to hold them in position. If you want to apply as a single row of text then cut slots all round the stencil approx 1cm from each character and use masking tape to hold them down. You can then hand paint or spray them. Hand painting is advised.
Polish WW2 Helmet Stencil

This one is best hand painted with a small fine brush. Attached the stencil using masking tape, then paint the stenicl lines in yellow with a dry paint, press down each stencil line prior to painting. It can be a bit tricky but dont worry if there is 'bleed' many originals had this or you can touch up using the same paint as the helmet (I advise against this unless you have matching helmet paint!). It is best to avoid spray painting due to the number and closeness of the stencil lines.
WW2 Medic Helmet Stencil Medical Corp
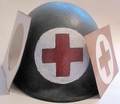
Cut slots all the way around the circular stencil approx 5mm to the edge of the circle, this allows the stencil to fold over itself. Tape down and use the circle as a guide to painting the white circle. Allow to dry and then using the cross, positioned centrally on the white circle to paint in the red cross. This stencil can be a bit tricky so we do recommend cutting slots on both circle and cross and recommend hand painting.
WW2 Italian Navy Helmet Stencil
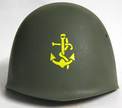 M33 Italian Navy
Cut slots all the way around the stencil approx 5mm to the edge of the circle, this allows the stencil to fold over itself although in this case it wont fold that much, if at all. Don't try and press the outer edges down, allow them to sit naturally but ensure the stencil part is firm and close to the helmet. If you are hand painting then just paint it in yellow paint, no need to tape it down. If you are spray painting just lightly tape all round the stencil and then use cloth or newspaper to cover the rest of the helmet. Use 2 to three thin coats and allow to dry between coats. The helmet to the left was hand painted.
WW2 8th REGIMENT PASUBIO Italian Military field artillery Regiment Stencil

Cut slots all the way round the stencil to approximately 5mm from the stencil cut outs, before applying it to the helmet. Then press down firmly all over the stencil to ensure you seal any gaps. Allow the outer edges to rise up. The important point is to ensure the stencil cut outs are sealed to the helmet. Then tape it down and press it down again. When taping down there is no need to push the masking tape firm with the helmet, just enough to hold it into position. Mask off the rest of helmet with cloth or newspapers and spray the stencil in matt or satin black. Use several thin coats. This stencil is suitable for hand painting or spray painting.
Italian Model 1933 Steel Helmet MVSN Black Shirts Stencil
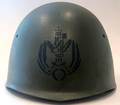
We recommend cutting slots all the way round the stencil before applying it to the helmet. Then press down firmly all over the stencil to ensure you seal any gaps. Then tape it down and press it down again. Mask off the rest of helmet and spray the stencil in matt or satin black. Use several thin coats. This stencil is suitable for hand painting or spray painting.
Italian Helmet Stencils (Stampino Sagoma)
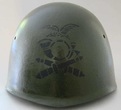
We recommend cutting slots all the way round the stencil before applying it to the helmet.
Then press down firmly all over the stencil to ensure you seal any gaps.
Then tape it down and press it down again. Mask off the rest of helmet and spray the stencil in matt or satin black. Use several thin coats. THIS STENCIL IS SUITABLE FOR SPRAY painting only.
Then press down firmly all over the stencil to ensure you seal any gaps.
Then tape it down and press it down again. Mask off the rest of helmet and spray the stencil in matt or satin black. Use several thin coats. THIS STENCIL IS SUITABLE FOR SPRAY painting only.
WW2 Italian Paratrooper Stencil - Stampino Parà Aerotrasportato
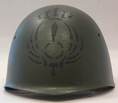
This stencil is only really suitable for hand painting beause of its size, although it could be spray painted if time and care is taken. Cut slots all round the stencil. Apply the stencil and smooth & tape down the crown, sword and circle. Paint these in by hand first and allow to dry. Then smooth down one of the wreaths and allow to dry and then do the other wreath. The size of this stencil prevents it from being completed in one painting.
Generale d’Armata WW2 Italian Helmet Stencil
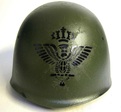
This stencil is only really suitable for spray painting as it has many small areas but could be hand painted if you have patience!Cut slots all round the stencil. Apply the stencil and smooth & tape down. Use newspaper to cover the rest of helmet. Spray paint in a very thin layer and repeat once each layer is dry. Do not apply in a thick spray.
Spanish Falange Stencil
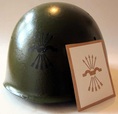
Suitable for hand or spray painting. I recommend cutting slots all the wat round the stencil before applying it to the helmet. Then press down firmly all over the stencil to ensure you seal any gaps.
Then tape it down and press it down again. Mask off the rest of helmet and spray the stencil in matt or satin black. Use several thin coats. Alternatively hand paint in matt or satin black paint.
Then tape it down and press it down again. Mask off the rest of helmet and spray the stencil in matt or satin black. Use several thin coats. Alternatively hand paint in matt or satin black paint.
30th Infantry Division Stencil - this is a very intricate stencil and you will need a very fine brush in order to get the detail correct. It is not suitable for spray painting.
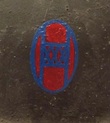
Remove the XXX from the backing paper and retain. Cut round the oval with slots all the way round. Apply to the helmet and press down firmly round the oval. Retain in place with masking tape. Using BLUE paint, paint in the entire oval. Allow to dry and carefully remove the oval stencil.
Apply the XXX over the blue oval, being careful to match up the XXX oval with the blue painted oval. Press down firmly over the XXX to ensure any gaps are reduced and seure with masking tape. Depending on how corked the helmet is there is likely to be small gaps and bleed, these will need to be hand painted after the XXX has been removed. Paint the XXX in RED paint using fine brush. Try and use the stenil as a template rather than completely covering it in paint, this will reduce bleed. You may want to wait for this to dray and apply a seond coat of red to ensure the blue is not showing through. Allow to dry and remove the XXX. Using a fine brush, you may then have to paint over any areas of bleed to ensure you get a nice crisp XXX.
Apply the XXX over the blue oval, being careful to match up the XXX oval with the blue painted oval. Press down firmly over the XXX to ensure any gaps are reduced and seure with masking tape. Depending on how corked the helmet is there is likely to be small gaps and bleed, these will need to be hand painted after the XXX has been removed. Paint the XXX in RED paint using fine brush. Try and use the stenil as a template rather than completely covering it in paint, this will reduce bleed. You may want to wait for this to dray and apply a seond coat of red to ensure the blue is not showing through. Allow to dry and remove the XXX. Using a fine brush, you may then have to paint over any areas of bleed to ensure you get a nice crisp XXX.
WW2 German Volkswagen (VW) Helmet Stencil
 Volkswagen Stencil
This stencil can be hand painted or spray painted (but will require finishing by hand). Cut slots all the way round the stencil to within approx. 5mm of the edge of the stencil. Apply the stencil and make sure it is firmly attached all over. Mask off the rest of the helmet and spray or hand paint in white paint.
Once dry, remove the stencil, you will then need to hand paint in any lines such as the circle. If using spray paint, then just spray a small amount into the can cap and use a fine brush to complete the gaps left by the stencil.
Once dry, remove the stencil, you will then need to hand paint in any lines such as the circle. If using spray paint, then just spray a small amount into the can cap and use a fine brush to complete the gaps left by the stencil.
WW2 Hanomag Air Defence, Security, Rescue & fire Service Helmet Stencil
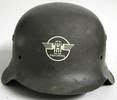 Hanomag Stencil
This stencil is pretty straightforward to apply. Cut slots all the way round the stencil to within approx. 5mm of the edge of the stencil. Apply the stencil and make sure it is firmly attached all over. Mask off the rest of the helmet and spray or hand paint in white paint. Once dry, remove the stencil, you will then need to hand paint in any lines such as the circle. If using spray paint, then just spray a small amount into the can cap and use a fine brush to complete the gaps left by the stencil.
WW2 NSU Motorenwerke AG or NSU Air Defence, Security, Rescue & fire Service Helmet Stencil
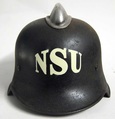 NSU Helmet Stencil
This stencil is pretty straightforward to apply. Cut slots all the way round the stencil to within approx. 5mm of the edge of the stencil. Apply the stencil and make sure it is firmly attached all over. Mask off the rest of the helmet and spray in white paint. You can also hand paint it if you wish.
Messerschmitt Air Defence, Security, Rescue & fire Service Helmet Stencil
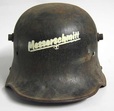 Messerschmitt Stencil
Notice in the pictures that the edges are a bit blurred - we did this as the original helmet we found had this too and all we did was to use too much spray paint! You can easily make yours sharper by ensuring you spray very thin layers! These were also painted in red and placed on the left hand side of the helmet.
This stencil can be hand or spray painted. Cut slots all the way round the stencil to within approx. 5mm of the edge of the stencil. Apply the stencil and make sure it is firmly attached all over. Mask off the rest of the helmet and spray in white paint. We prefer acrylic paints for this stencil as they are generally thinner. You do not need to mask it off if you are hand painting.
Junkers Security or Fireman's Helmet Stencil
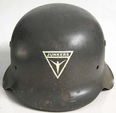 Junkers Stencil
This stencil is only really suitable for spraying & then touching up by hand with a brush. Cut slots all the way round the stencil to within approx. 5mm of the edge of the stencil. Apply the stencil and make sure it is firmly attached all over. Mask off the rest of the helmet and spray in white paint. We prefer acrylic paints for this stencil as they are generally thinner. Use several very thin coats and do not allow the paint to build up. Wait to dry and remove carefully. If there is any paint bleed you will need to touch up the base paint using a very fine brush. We recommend you do not use this stencil on helmets which have any value or historical interest as it is difficult to touch up the paint to get a good match.
Mercedes-Benz Security or Fireman's Helmet Stencil
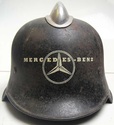 Mercedes-Benz Stencil
This stencil is only really suitable for spraying. Cut slots all the way round the stencil to within approx. 5mm of the edge of the stencil. Apply the stencil and make sure it is firmly attached all over. Mask off the rest of the helmet and spray in white paint. We prefer acrylic paints for this stencil as they are generally thinner. Use several very thin coats and do not allow the paint to build up. Wait to dry and remove carefully. If there is any paint bleed you will need to touch up in black using a very fine brush. We recommend you do not use this stencil on helmets which have any value or historical interest as it is difficult to touch up the black paint to get a good match.
WW2 Focke Wulf Factory Helmet Stencil M34 and other Helmets
 Focke Fulf Stencil
This stencil is only really suitable for spraying. Cut slots all the way round the stencil to within approx. 5mm of the edge of the stencil. Apply the stencil and make sure it is firmly attached all over. We used a hair dryer once applied to war up the stencil and give it a bit more felxibility. Mask off the rest of the helmet and spray in white paint. We prefer acrylic paints for this one as they are generally thinner.
Use several very thin coats and do not allow the paint to build up. Wait to dry and remove carefully. If there is any paint bleed you will need to touch up in black using a very fine brush. We recommend you do not use this stencil on helmets which have any value or historical interest.
Use several very thin coats and do not allow the paint to build up. Wait to dry and remove carefully. If there is any paint bleed you will need to touch up in black using a very fine brush. We recommend you do not use this stencil on helmets which have any value or historical interest.
German 5th Schnellboot Insignia

5th Schnellboot Insignia
This one part stencil is straightforward and can be hand painted or spray painted. No need to cut any slots round the outside, unless you want to, just apply the stencil smooth down round the inner edge and hand or spray paint (mask off rest of helmet if spray painting). You should be left with a lovely eagle and torpedo marking for the 5th S-Boot Flotilla.
German DAK Helmet Stencil Palm tree and Swastica

DAK Helmet Stencil
This one part stencil is straightforward and can be hand painted or spray painted. No need to cut any slots round the outside, just apply the stencil smooth down round the inner edge and hand or spray paint. You should be left with a superb Deutsches Afrika Korps helmet stencil.
WWII German Volunteer White Russian Stencil Version 1

White Russian Stencil
This is a one part stencil and is straightforward to apply. Cut slots all round the stencil. press down in the position required and tape down using masking tape. Then spray or hand paint using white paint.
WW2 German White Russian Stencil - Version 2
 White Russian German
This is a three part stencil. Apply the large shield first and use masking tape to seure. Then paint all round the edge in black. Allow to dry and the apply the smaller shield and apply white paint. Allow to dry and the using the diagonal stripe stencil apply this in red.
German M42 7./St.G I Graf Zeppelin Stencil
We recommend cutting slots all the way round the stencil before applying it to the helmet. Then press down firmly all over the stencil to ensure you seal any gaps.
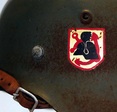
Graf Zeppelin Stencil
Apply the shield stencil first. Then hand paint round the outer shield in white. Allow to dry and remove.
Then hand paint the shield in white. Allow to dry and then reapply the shield. Paint the edges and arrows in red. Allow to dry and remove. Apply the helmet stencil over the top of the painted stencil. Paint the helmet and cockade in black. Allow to dry and remove. Then hand paint in white the dot on the red arrow and the gaps on the outer shield. This can all be done in less than one hour with the corret paint.
To freehand paint this stencil will take several hours - we know as we did it to create the stencil! This stencil is suitable for hand painting only and we reommend a fine brush.
Specific detailed instructions for some WW1 Stencils:
WW1 80th Infantry Division Battalion Helmet Stencils

80th Inf Div Stencil
This stencil will allow you to do three battalions and 5 companies from the 80th Infantry Regiment in WWI. The picture to the left shows the 313'd Machine Gun Battalion HQ.
White (left) & blue (right) - 313'd Machine Gun Battalion HQ & Companies A to D.
White (left) & red (right) - 314th Machine Gun Battalion HQ & Companies A & B.
Red (left) & Blue (right) - 315th Machine Gun Battalion HQ & Companies A to D.
Apply the full shield first and hand paint in base colour (white or red). Allow to dry and then apply the 'half' shield and paint in either blue or red. Allow to dry and paint the company letter in white above the shield. Get the stencils here.
WW1 2'd Infantry Division - Indian Head Division

2'd Infantry Division
Apply the diamond first and hand paint in black or blue (both were used in WW1). Apply the star and paint in white. Allow to dry and then apply the Indian head, paint the head in red and the ribbons in blue. There were numerous variations of this stencil used in WWI, this stencil allows you to hand paint several different variations. The stencil like all our stencils are re-usable. this stencil has been designed to look hand painted and the points of the bottom two stars are deliberately missing as this stencil was taken from an original. If you want the full star, apply the star stencil centrally and paint it in and allow to dry. Then rotate the star points over the missing points and paint each one in, in turn. You can also hand paint in the detail to the Indian head, as many were minature works of art!
WW1 26th Infantry Division - Yankee Division Stencil

26th Infantry Division
Apply the square first and paint in khaki or brass (black and various other olours were also used). Allow to dry and then apply the 'YD' stencil & paint in the 'YD' in blue (various other olours were used). Allow to dry and then hand paint in the 'gaps'. You may also want to extend the rear 'D' legs, as many WWI 'YD' stencils were very pronounced and elongated.
WWI 101st Sanitary Train World War One Helmet Stencil - Red Cross & 101 ST

101st Sanitary Train
Apply the cross first in red, allow to dry and then apply the character stencil. Paint characters in white. This is a nice and easy stencil for beginners who want a pretty unusual helmet stencil. This stencil is only suitable for hand painting.
WW1 27th Infantry Division - "Orion"

27th Infantry Division
Apply the blue circle first, allow to dry and once dry apply the red 'O' and Orion stars etc. Take great care with the stars as they are very small and are best applied with a very dry brush. This stencil is only suitable for hand painting.
Instructions for helmet enhancements:
If you want to make a band round your helmet such as a British or Airborne MP helmet, then buy some masking tape approx 3/4 to 1" wide and place this in the position round the helmet where you want the band to be. Then using masking tape place it up to the edges of the first masking tape all the way round the helmet. Finish with two vertical strips where you want to end the band at the front of the helmet. Then remove the central tape and hey presto you have a stencil for the band! You can get your stencils here and remember just contact us if you want any made that you can't see on our site.
If you want to make a band round your helmet such as a British or Airborne MP helmet, then buy some masking tape approx 3/4 to 1" wide and place this in the position round the helmet where you want the band to be. Then using masking tape place it up to the edges of the first masking tape all the way round the helmet. Finish with two vertical strips where you want to end the band at the front of the helmet. Then remove the central tape and hey presto you have a stencil for the band! You can get your stencils here and remember just contact us if you want any made that you can't see on our site.
|
|
