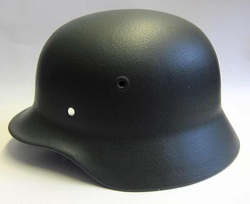
Instructions > WW2 German Helmet Paints Instructions
German Helmet Paint Instructions:

Instructions for hand painting your German Helmet:
There is no need to use a primer before painting. Makes sure your helmet shell is clean and the bare steel has been lightly rubbed with steel wool all over to remove cleaner and/or grease.
1. Shake the bottle vigorously for approximately 2 to 3 minutes. The bottle contains a ball bearing which will help to mix the paint.
2. Pour out approximately one quarter of the paint or less into a small container. You can always add more. Mix again with a clean wooden stick or similar item.
3. On the inside of the helmet, using a soft paintbrush approximately 3cm or 4cm wide, apply the paint in sections in a normal brushing motion. Then go back over it without applying more paint using a stabbing motion with the end of the brush. This gives the effect that the helmet has been spray painted and removes brush marks. A soft brush leaves tiny dimples, just as if it had been sprayed.
4. Continue to do this till the helmet is completed. Allow to dry for at least 2 hours and then paint the outside in a similar manner. You can also bake the helmet in an oven at 100 degrees centigrade for an hour if you wish.
5. The helmet is now complete and you can add your decals at this point if you wish.
Optional: You can use very fine grade wire wool and go over the whole helmet after painting if you want to get rid of any proud points or flatten down the paint some more, just make sure you use gentle circular movements in sections across the whole helmet and do this gently, you are not trying to remove the paint nor leave rubbing marks!
Wash up your utensils in warm water.
You should now have a brand new painted German Helmet. You can get your WW2 German paint here.
|
|


