WarHats.com

  • About
  • Store
    • WW2 American Helmets
    • WW2 American Soft Headwear
    • WW2 German Helmets >
      • Fallschirmjäger Helmets
      • Waffen-SS-Helmets
      • Luftwaffe-Helmets
      • Heer-Helmets
    • WW2 German Soft Headwear >
      • U-Boat Caps
      • Luftwaffe Caps
      • Allgemeine SS Caps
      • Heer & Police Caps
      • Waffen SS Caps
      • Zeppelin Officers Caps
      • Kriegsmarine Caps
      • NSDAP-Caps
    • WW2 Helmet & Hat Accessories
    • WW2 British Helmets
    • WW1 British Helmets
    • WW1 German Helmets
    • WW1 German Soft Headwear
    • WW1 Allied Soft Headwear
    • WW1 Helmet & Hat Accessories
    • Other Periods Hats & Headwear >
      • British Early 19th & 20th Century Hats & Helmets
      • American Civil War Hats Caps Kepis
      • Film Hats Helmets LARP Steampunk
      • Vintage Yachting Caps Hats and accessories
    • Other Periods Hats & Headwear Accessories
    • Military Books
    • Genuine Militaria
  • Support
  • Instructions
  • Refurbishment
  • Testimonials
  • Contact
    • Contact Us
    • Newsletter

Instructions > WW2 M1 M1C & M2 USA Helmet Cork Texture Instructions

American M1, M2 or M1C Helmet Corking Texture Instructions:

How to apply your WWII Cork to your M1, M2 or M1C Helmet:

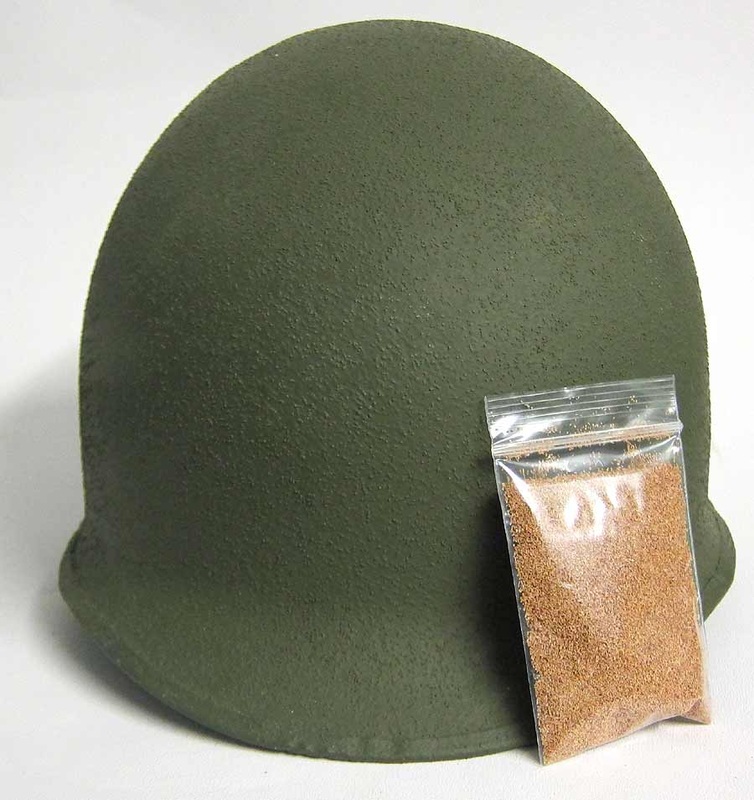
M1, M2 or M1C Helmet Cork Texture

These instructions tell you how to apply our cork after the helmet has been prepared for re-painting. We think you will find that our cork and method gives the best results, certainly better than some of 'porridge' jobs we see too frequently on Ebay. You need a paint brush with natural and soft bristles approx 1 1/2" wide is fine. You also need a receptacle to hold the paint and of course you need our cork.

Once you have cleaned your helmet and stripped it back to the bare metal, then make sure it is clean using white spirit. Allow to dry and get ready to apply your cork.

Lay out some newspapers, this will be used to catch any excess cork.

Put some paint into the receptacle, paint this onto the helmet and then dab it with the brush to remove paint lines. The whole outer shell should be painted and then dabbed ready for corking.

Hold the helmet on the inside and then with your other hand gently sprinkle the cork onto the helmet, whilst rotating and turning the helmet. Do not put loads on, there is no need, a small thin layer is adequate and copies the WW2 Helmets. The key is to make sure you have even coverage, not big blank areas and thick areas. Allow to dry properly - ideally overnight. Then follow option A or B instructions below:

Option A: If you want the cork to be proud and raised - Once dry, apply a second coat of paint over the cork in a dabbing motion do not try and paint it on like you are painting a door, you must dab it to get a nice textured effect.

Option B: If you want the cork to be flatter like some versions of M1 - then using a flat wooden stick, press down on the cork all over the helmet, this compresses the cork flatter (we sometimes dampen the whole helmet first before applying pressure with the stick). Apply a second coat of paint over the cork in a dabbing motion do not try and paint it on like you are painting a door, you must dab it to get a nice textured effect.


You can get your WW2 M1, M2 or M1C Helmet Cork Dust here.

M1 Helmet Cork Texture after application
M1, Helmet Cork Texture after application
M1, M2, M1C Helmet Texture
M1, M2, M1C Helmet Cork

    
English  |  Deutsch  |   Français

    
Contact Us
| Terms & Conditions  |  Privacy & Copyright Policy  |  Cookies Policy | Links | Newsletter | Wholesale | Search

Translate this page into your language:


Dont miss out on new items, subscribe to our newsletter:

Newsletter
Picture
Picture
Picture
Picture
Picture
Picture
Picture
Copyright© 2022 www.WarHats.com