Instructions > WW2 M1 M1C & M2 USA Helmet Cork Texture Instructions
American M1, M2 or M1C Helmet Camouflage Scrim Instructions:
How to apply your WWII Scrim to your M1, M2 or M1C Helmet:

M1, M2 or M1C Helmet Scrim camouflage
These instructions tell you how to age & apply the helmet scrim camouflage material.
You need a net attached to your helmet before you can attach the scrim, we also sell genuine nets here.
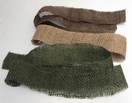
Take each of the scrims and cut each into two or three lengths depending if you want shorter or longer pieces.
If you want them to look a bit more worn and used, then roll them up roughly lengthways and leave outside in the rain in a tin can or similar for one or two nights. Add water to the can if it is not raining. Let them dry and give them a good rolling with your hands to fray the edges.
Take one of the scrims and start at the bottom edge of helmet and push the end through the net. Take the other end and move it up slightly so its not parallel and push this end through the net. Tie off each end with string and then tie off in the middle with string. Make sure you put the scrim at angles not just in straight lines.
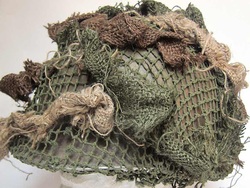
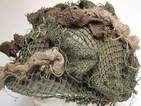
Work your way round and up the helmet. Make sure you mix the three colours tan, brown and green so you get a really good camo effect. The picture above shows the material tied off loosely in several places. You can also make it look 'tighter' by twisting the scrim and attaching it so it looks less bulky.
You can get your WW2 M1, M2 or M1C Helmet Scrim here.
|
|


